Load testing is a crucial aspect of software development that involves modeling the expected usage of a software program by simulating multiple users accessing the program concurrently. One of the most critical parts of a website is the login/authentication endpoint. In this article, we will explore how to load test the authenticate endpoint on an ASP.NET Zero app and explain the process step by step.
ASP.NET Zero is a powerful starting point for new web applications with a modern UI and a SOLID architecture, complete with full source code. You can learn more about ASP.NET Zero by visiting their website at https://aspnetzero.com/.
Creating the Project
Before we begin the test, we need a web project to test. To get started, go to https://aspnetzero.com/download and create your project. If you are not an ASP.NET Zero customer, you can create a project on https://aspnetboilerplate.com/Templates, create a project, and use it as well.
Preparing Test Data
To test the authenticate endpoint, we need dummy user records. We can achieve this by creating a CSV file similar to the one in the image below, with 500 rows of user data. By creating two rows and scrolling down to row 500 in Excel, we can quickly generate users with usernames such as admin1, admin2, admin3, and so on.
By following these simple steps, you can load test your authenticate endpoint on an ASP.NET Zero app and identify any potential performance issues before going live. It is essential to ensure your software program can handle a significant amount of user traffic to provide a seamless user experience.
![]()
If you are using ASP.NET Zero, you can easily import this excel to your database on User List page by using “Excel operations -> Import from Excel” action button.
After importing the user data, you can remove other columns than UserName and Password from the excel file and save it as a CSV file. We will use this final CSV file for our test.
JMeter
The Apache JMeter™ application is open source software, a 100% pure Java application designed to load test functional behavior and measure performance. We will use JMeter for our load test. So, go to https://jmeter.apache.org/ and download the latest version for your OS.
Thread Group
First add a Thread Group to your Test by right clicking the main test icon as shown below;
Then, set number of threads (users) to 500 and set Ramp-up period to 10. If you need to use a higher number of users, you can increase thread value but be sure to increase the user count in the previous CSV/Excel file we have created to the same number.
CSV Data Set Config
Then, right click to thread group and add a CSV data set config as shown below;

Click the created CSV Data Set Config item and select the file we created in the previous step by using file browser on “Filename” field. After that enter “UserName,Password” to the variable names field and set ignore first line field to True. By doing this, we will be able to access columns of the CSV file by using its column names.
Before proceeding further, if you want to be sure that JMeter reads our CSV file, you can add a “Debug Sampler” item right under the CSV Data Set Config item and run the test once. Debug Sampler will log the values of the CSV file under the JMeter Variables section.
HTTP Request
Since we are going to test an endpoint on a web app, we need to make an HTTP request to that endpoint. To do that, create a “HTTP Request” item right under the CSV Data Set Config item.
It should be a POST request and it should make a request to https://localhost:44301/api/TokenAuth/Authenticate endpoint. If your app uses a different port, you can change this URL as you wish.
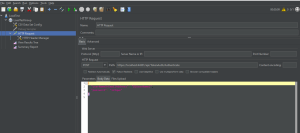
For each request we want JMeter to get the username & password pairs from the CSV file we selected before and sent those items to endpoint we defined. In order to do this, set BodyData of the HTTP Request as shown below;
{
  "userNameOrEmailAddress": "${UserName}",
  "password": "${Password}"
}
HTTP Header Manager
We also need to configure “Content-Type” header for our HTTP Request. To do this, add a “HTTP Header Manager” under the HTTP Request item and add a new item to its headers list with the key “Content-Type” and value “application/json“.
Finally, our HTTP Request configuration should be like this;
Test Result
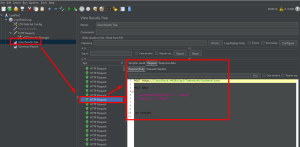
Finally, add “View Result Tree” which shows status for each request and “Summary Report” which shows a summary for the HTTP Requests.
Now, we are ready to execute the test. After executing the test, we can check each request and see its post data and result as shown below;

Or, we can check overall result of the test as shown below;

By following a similar approach, we can test other endpoints of our app. If the endpoint is an authenticated endpoint, we should get a token from Authenticate endpoint we tested above, store it in JMeter and send with the request for the endpoint we want to test. This can be the topic of another article.

